There can be no bones about it:
App owners have to put the work in well before the mobile app development process begins to give their projects any chance of succeeding.
That means having a solid business plan, a clear app idea and a deep understanding of your audience.
But those who have these bases covered will still encounter a minefield. How do you decide who’s going to design, develop, host and maintain your mobile application?
If you choose to ride solo on this journey, the chance of you ending up in the 80% of apps that don’t survive longer than a year skyrockets.
That’s because of the sheer amount of variables involved in each of the processes mentioned above.
Now, there are numerous escape routes that help mitigate these risks, like using a no-code app builder or partnering with a dev agency.
But, arguably, there’s only one option that covers all bases…
We’ll tell you all about this, after painstakingly covering every step involved in the process.
Keep scrolling 👇or use the contents to flick through.
Mobile app development process: Quick-fire definition
The mobile application development process is an end-to-end development schedule, involving the planning, strategy, development and testing of your app. It contains numerous stakeholders, including app owners, project managers, designers and developers and can last anywhere from weeks to several months or years.
The length of the process largely depends on the complexity of your app and the app development route you choose.
The one thing you NEED to do before the app development process starts
Investing in an app might seem like a no-brainer, given that they can deliver business-transforming benefits.
But without a clear focusonhow you’re going to help users or solve a specific business problem, starting development is a huge leap of faith – especially given the costs involved.
So before you start scoping out your app, ensure that it’s mapped to your short-term and long-term business objectives.
By performing this analysis, you'll not only get clarity on whether or not you should create an app, but also:
- The type of app you need
- The cost of your app
- Your app development route
Plus, you’ll save yourself time and money.
Simple business automations, for example, could be enabled by a no-code platform like Microsoft PowerApps or Studio Store. These are low-cost, off-the-shelf solutions, ready to go in a matter of hours.
Want to start your app project with us?
Book a demoSpeak with one of our product experts today.
By proceeding you agree to Builder.ai’s privacy policy and terms and conditions

Whereas more complex automations may require a custom solution, tailored specifically to your workflows. In this case, a dev agency or app platform, like Builder Studio, are likely to be better suited to your needs. Just bear in mind that the more complex your app is, the longer your development time and the higher your costs will be.
These are just a couple of reasons why having clarity on your app idea helps you chart a course that fits your business. Without it, though, it’s easy for things to go awry.
The mobile app development process: An exhaustive 9-step breakdown
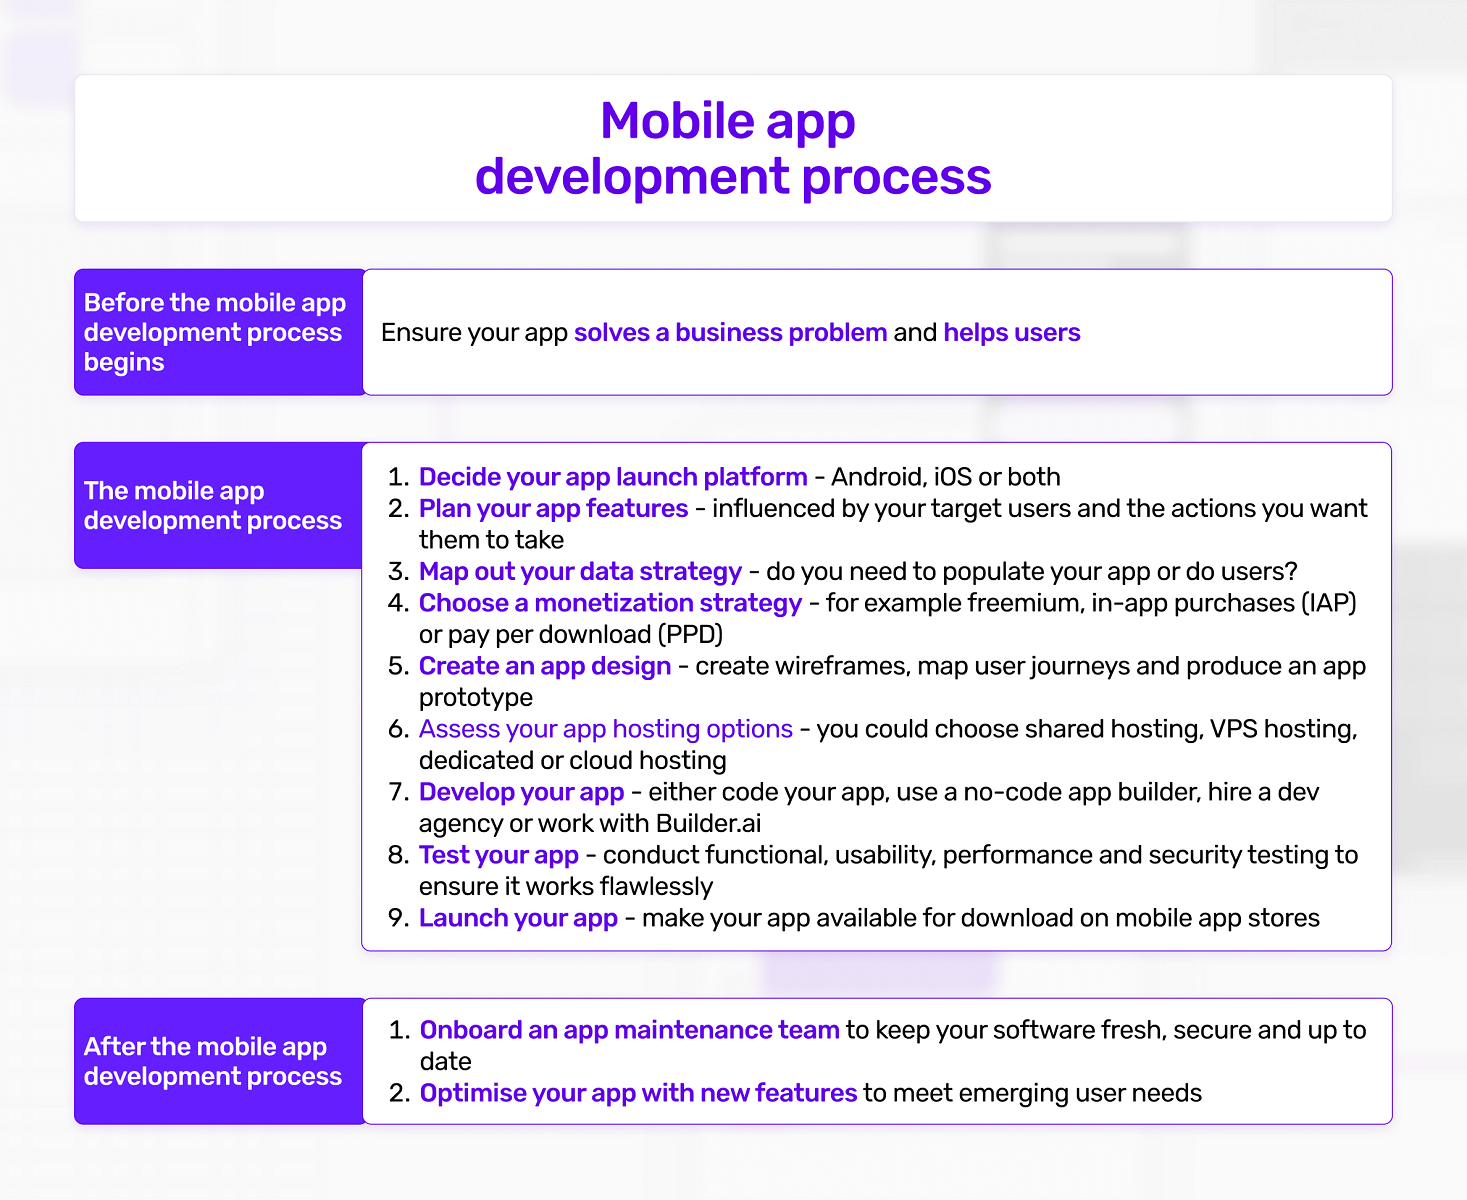
Now you have a clear vision for your app, you can begin the app development process with confidence. Here’s every step you’ll need to follow to ensure that everything runs smoothly 👇
- Decide your launch platform
- Plan your app features
- Map out your data strategy
- Choose a monetization strategy
- Create an app design
- Assess your hosting options
- Develop your app
- Test your app
- Launch your app
Step 1 - Decide your mobile platform
Once you know the user needs you’re meeting or the business problems you’re solving, your chosen launch platform should be clear, whether you’re creating an app for Android or developing an iOS app.
Creating or having a website to supplement your app is also helpful because they’re accessible by every device and mobile operating system.
Whichever platform you choose, you’ll need to use different app programming languages to develop your app.
But if you have a distinct split in your user base, simultaneously creating native apps for both mobile platforms is worth considering.
Step 2 - Plan your app features
Similar to your launch platform, the app features you need are heavily influenced by your target users and actions you want them to take.
Let’s say you want to create an ecommerce store, for example. In this case, you’d need an online selling platform, which is a specific type of app and website package optimised for ecommerce.
Typically, these types of apps can be personalised with your branding, but they won’t have custom functionality. Instead, they’ll have a set list of pre-packaged or drag-and-drop features, including things like:
Product catalogues
Payment gateways
And they help to enable straightforward, Business-to-Consumer (B2C) transactions. But that’s not quite the end of the story.
Some apps have a multitude of different users, meaning the app requires several user interfaces.
Take Uber Eats, for example. In this case, there are three distinct user experiences; one for customers, one for restaurants and one for delivery people.
While customers see a list of restaurants in their local area and associated menus, delivery drivers need to both navigate to the restaurant and the delivery address. Finally, restaurants need to be able to receive, accept and distribute orders via delivery drivers, all of which will require a range of APIs.
As a result, you’ll need a range of custom features to enable this which can be provided by dev agencies and app development platforms.
Step 3 - Map out your data strategy
Your next step is to populate your app.
Drawing again on the examples above, this is more straightforward if you’re simply selling online. That’s because you can add the vast majority of the data your app needs yourself.
After all, the main things you need are product images, descriptions and associated pricing.
But things become more complicated when more stakeholders are involved. If you’re building a restaurant marketplace like Uber Eats, you’re reliant on other people to populate your app with data.
And that’s not just going to happen by accident.
You’ll have to engage with local restaurants, develop relationships and offer incentives simply for them to consider listing on your app over your competition.
As you can imagine, it’s unlikely that you’re going to be up and running in a couple of weeks and the mobile app development process will be extended.
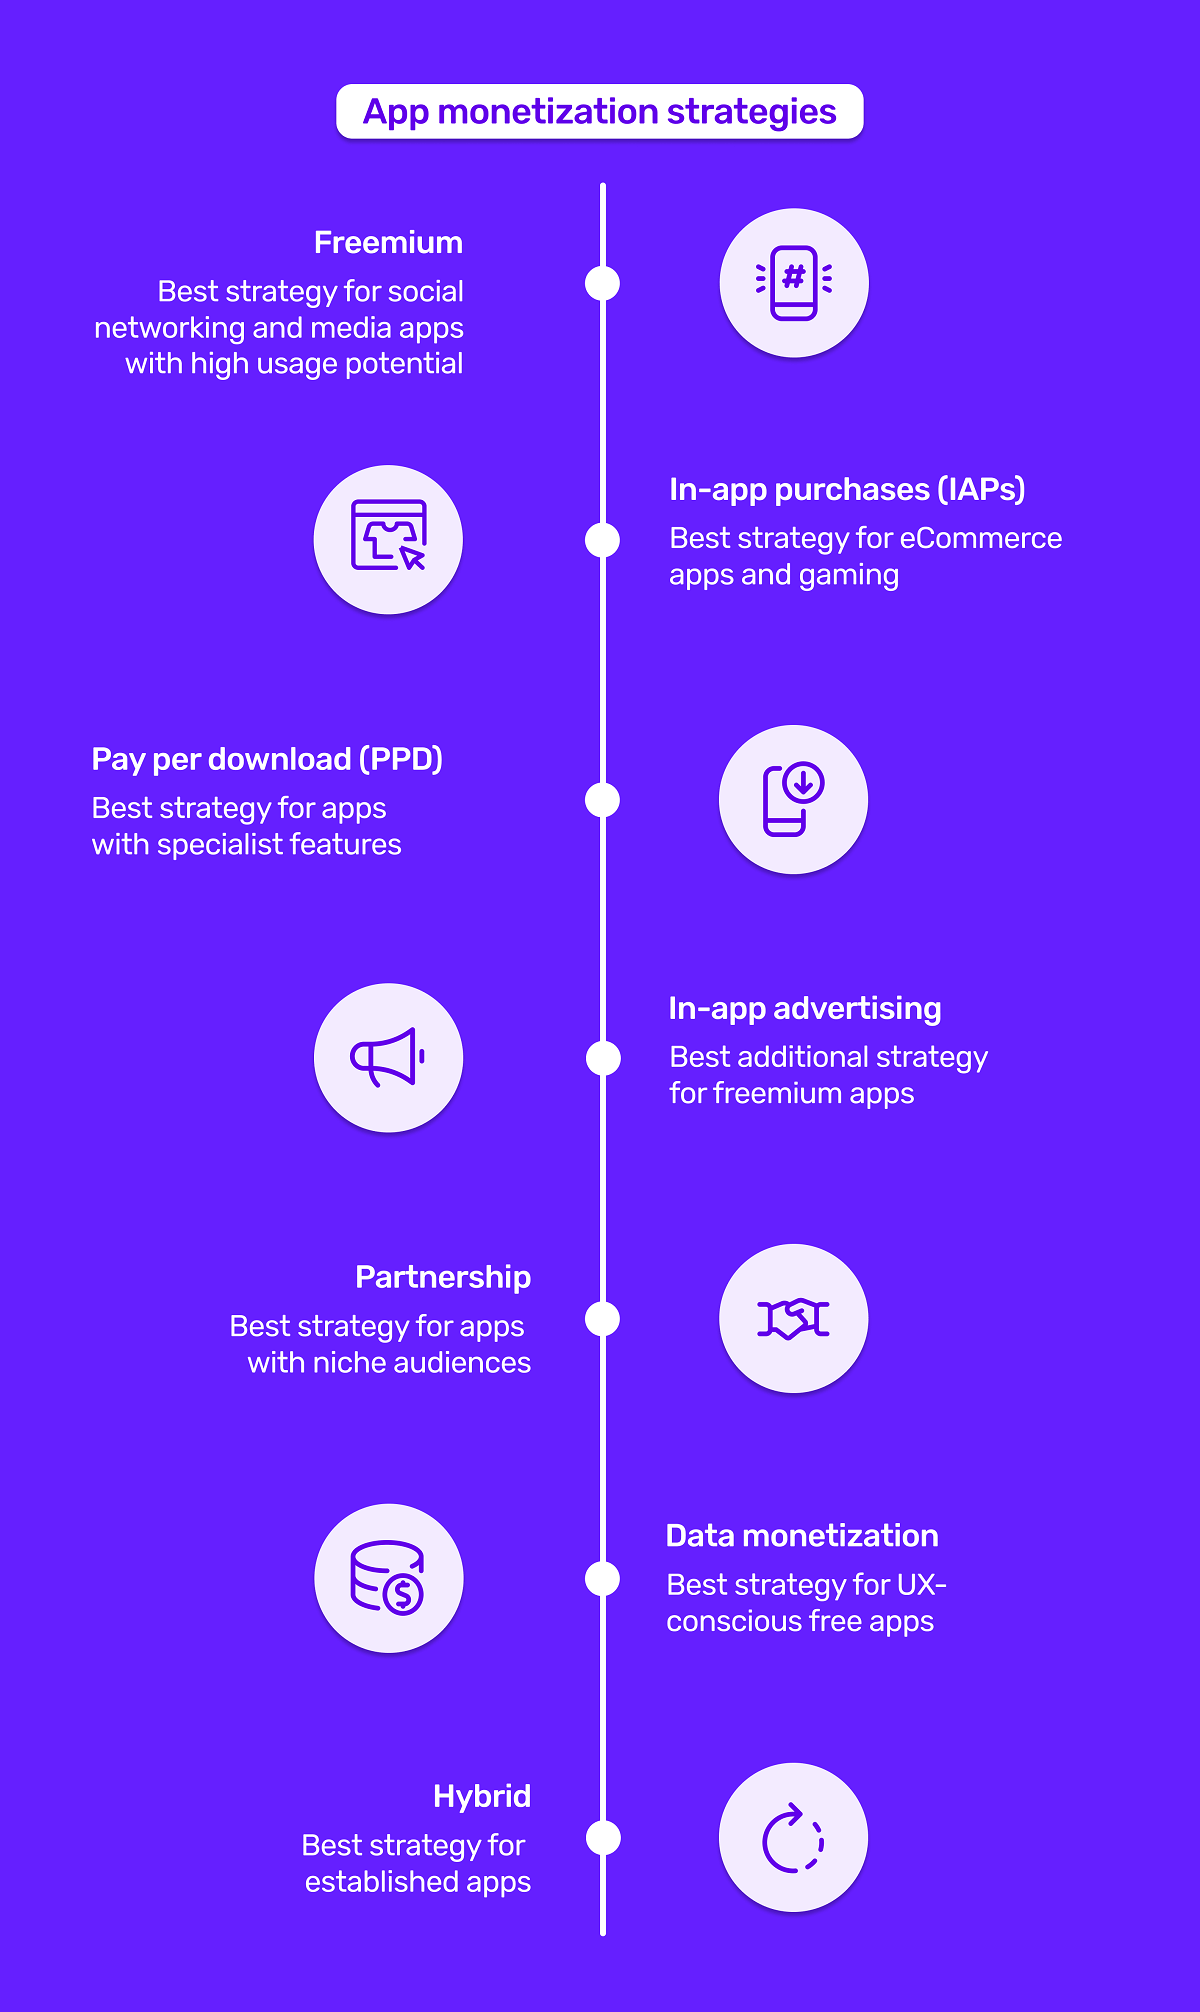
Step 4 - Choose a monetization strategy
Your primary app monetization strategy may be straightforward, especially if you’re setting up an online store.
But there are a wide range of supplementary monetization models that are worth considering, as you can see from the infographic above.
Freemium models, for example, are increasingly used by all types of businesses to create new revenue streams. Take ASOS Premier, for example.
Aside from the myriad of in-app purchases customers can make within the ASOS app, they can also unlock unlimited free next day deliveries for around $10 per year.
It’s ideal to map this out before formal app development begins so your app is best equipped to contribute to your business’s bottom line from the get go.
While it can also be explored at a later date, monetization models influence the design and development of your app and impact user experience. This means it’s far easier to decide on a monetization model before you make your app.
Step 5 - Create an app design
Now you’ve locked down your app type, features and strategy, it’s time to start the app design phase.
The natural starting point of the mobile app design process is to create wireframes. Essentially, these are outlines for your app.
To flesh them out, you then need to start mapping users journeys. This helps you optimise the flow of your app, ensuring user experience (UX) is up to scratch and it's as easy as possible for potential users to take desired actions, such as purchasing.
This will culminate in an app prototype, which gives you and other key stakeholders the opportunity to experience your app before any hard coding takes place.
Step 6 - Assess your hosting options
When it comes to hosting your app, you have several options and the one you choose will be largely informed by the type of app you’re creating.
For example, a smaller app with less scale could opt for shared hosting. This is built for apps with lower traffic - like micro businesses or early stage startups - who share resources on a single server.
On the other hand, a more established small business looking for more scale could opt for Virtual Private Server (VPS), which offers higher performance than shared hosting.
Meanwhile, larger organisations typically opt for dedicated or cloud hosting, as these options offer maximum flexibility, customisation, scalability and performance.
Step 7 - Develop your app
Self code | No code | Development team | Builder.ai | |
Development speed | Very slow | Fast | Slow | Competitive |
Development cost | Very low | Low | High to very high | Up front and transparent |
Customisability | High | Low | Very high | Very high |
Like hosting, when it comes to developing your app, you have a range of options depending on your requirements. These include:
- Coding your app yourself- if you have the technical expertise and time, you could develop your own app
- Using a no-code app builder- these allow non-technical users to quickly and cost-effectively build simple web and mobile apps
- Hire a development team- if your developers don't have the resource to dedicate to an app development project, or you don't quite have capacity to hire an internal team, you can outsource your app development project. However, since most agencies work on multiple projects and charge by the hour, there is the potential for costs and timelines to spiral
- Onboard Builder.ai- offers a middle ground between no-code app builders and dev agencies. On the one hand, you can create apps cost effectively and at speed. On the other, you’re not restricted by templates and have the ability to level up your app as you scale
Check out the table above 👆to see what you can expect from each of these development routes.
Step 8 - Test your app
Although we’re approaching the end of the mobile app development process, you’re not ready to release your app into the wild just yet.
Before you do that, it’s vital that you do some app testing. This quality assurance process ensures that your app performs across a range of devices, mobile operating systems and screen sizes.
The key frameworks you should use in the testing phase include:
- Functional testing- focuses on testing individual functions or features of the app to ensure they work as they should
- Usability testing - involves observing real users as they interact with the app to perform specific tasks or actions and helps identify any usability issues, navigation problems, or design flaws that may lower user satisfaction and hinder efficiency
- Performance testing - assesses an application's responsiveness, scalability, stability, and resource usage under different degrees of pressure, or “load” conditions
- Security testing - identifies vulnerabilities and potential security risks in an app by testing it against unauthorised access, data breaches and malicious attacks
By using each of these frameworks, you’ll minimise the issues app users have when they download and interact with your app. But you can’t have a set–and-forget attitude to testing, which we’ll come to later…
Step 9 - Launch your app
Making your app available to download via mobile app stores is the culmination of all your hard work and marks the end of the app development process.
To ensure you reach all your target users, you’ll need to conduct app store optimization, which is similar to search engine optimization (SEO).
You’ll also need marketing campaigns to build awareness of your app beyond the adverts in the Google Play Store and Apple App Store.
Remember to engage with your user base to gain their feedback and inform your future developments, which we'll come to next.
Two often-forgotten essentials you MUST invest in after the app development process
Now that your app is a living, breathing, revenue-generating machine, it might seem like your work is done.
But to ensure sustainability and future success, you can’t rest on your laurels. Here are two things that’ll keep you ahead of your competitors 👇
1 - Onboard an app maintenance team
Testing your app’s functionality, usability, performance and security during the app development process is all well and good.
But after this is complete, things change.
Nasty bugs can crop up and breaches can happen, especially if you don’t update your software. With an app maintenance service, you can avoid this.
Constant infrastructure monitoring, for example, ensures that fixes happen before you – or more importantly, your users – notice. This means your app’s revenue numbers continue to skyrocket while customers learn to trust your brand.
2 - Optimise your app
Chances are, if your users love your app in its current form, they’ll be expecting even more from you in the future. Because of this, it’s likely you’ll need to add some new features.
But this isn’t possible with every type of app.
With no-code app builders, for example, it’s notoriously difficult to scale because your app is based on rigid templates for which you don’t own the code.
So when you do choose an app development route, this is something to bear in mind.
The new-and-improved mobile app development process
In the intro, we promised you a solution that would simplify the app development process. So here it is Builder.ai’s award-winning app development platform:
✅- Offers a fully managed service with a dedicated project manager, who keeps all stakeholders on your app project aligned and on track; you never need to speak to a developer or write a single line of code
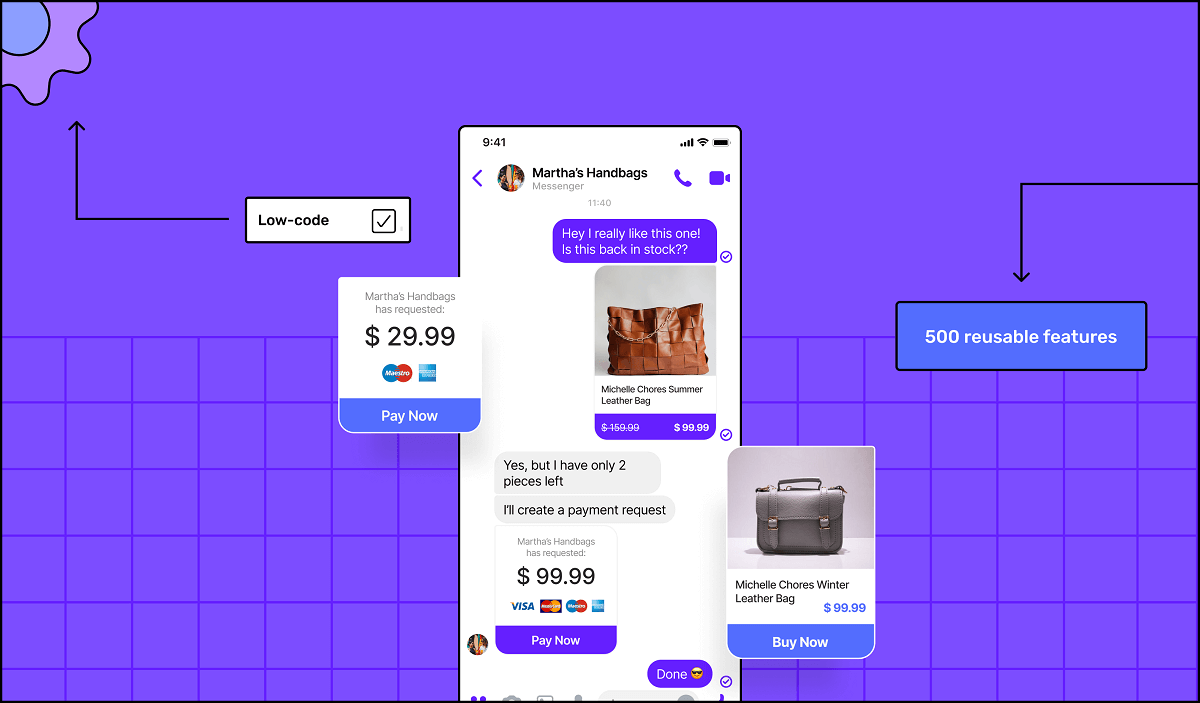
✅- Speeds up development time by giving you access to a comprehensive library of reusable features, fitted together by AI
✅- Gives you upfront costs and competitive timelinesso your project stays under control
It also:
➕Allows you to build without limits; we can create any customisation you can think of
➕Provides you withcost-effective hosting solutions, including Microsoft Azure, AWS and Digital Ocean
➕Enrols you on anapp maintenance plan to keep your software up to date and secure
➕Helps you launch your appon major mobile app stores
Basically, we take care of all the technical stuff so you can focus on achieving (and maintaining) business success. If that’s something you’d like to explore, please get in touch 👈
Conclusion
Although following the steps in the mobile app development process is essential, it’s clear that what comes before and after it is just as important.
After all, there’s no point creating a flawless app that fails to solve user needs or business problems.
Equally, it’s futile to meticulously follow each phase and then forget to update and optimise your app.
There can be no doubts though:
Riding solo in this process is more than a full-time job and hiring help gives you the best chance of success.
Entrepreneurial senior management executive of fast growing technology businesses. Successful in taking ideas from concept to profitability, using a blend of lean, agile and rapid result methodologies. A background in building and managing cross-functional and hybrid teams, with a record for retaining talented individuals and delivering results. Skilled in developing and maintaining a clear product and project vision, strategy and roadmap. Willing and able to adapt to changing environments. Often named as a Crisis Manager with a vision to “Make Things Happen”.


 Facebook
 X
X LinkedIn
 YouTube
 Instagram
 RSS
RSS