Congratulations on creating an app! Now it's time to share it with the world — and where better to publish it than Google Play Store, the home of 3.5 million apps?
In this blog, we’ll walk you through every step you need to follow so you can successfully launch your app to the world’s largest mobile app store.
After that, we’ll reveal a cheat code that helps you bypass red tape and launch your app at hyper-speed.
A small heads-up before we start:
If you have pending pre-launch tasks — say testing your app, checking compatibility with other devices or getting your signing certificate — you should resolve them before starting this process.
But if you have everything checked off, then it's time to get started.
Step 1 - Create your Google developer account
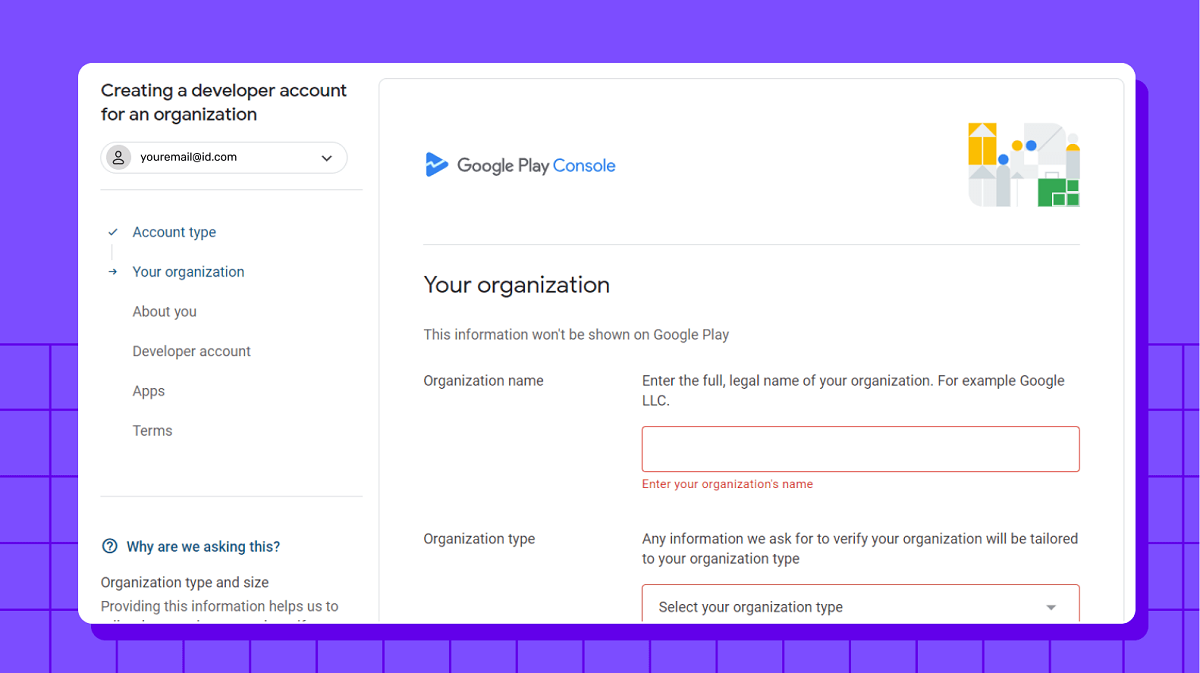
Before diving into the uploading process, you need to register a Google developer account. This is pretty straightforward but crucial, as without it, you can't publish your app on Google Play.
You can easily sign-up using your current Google Account or create a new developer account just for your app. It’s worth noting that you can easily transfer your app to any of your accounts if required.
You need to pay $25 as a one-time registration fee, before adding personal information like your developer name, contact email and website URL. Finally, you sign the Google Play Developer distribution agreement.
Step 2 - Add a merchant account
If you have an app monetization strategy like pay-per-download (PPD) or in-app purchases (IAP), you need a Google Merchant account. Here, you can track app sales, analyse reports and manage your monthly payouts.
To create one, you simply need to:
- Sign in to Play Console using your developer account
- In the menu, click on Reports and select Financial Reports
- Click on “Set up a merchant account now”
- Fill out your business details
- Click Submit
Your merchant profile automatically links to your developer account, so no worries there.
Step 3 - Review Google Play Store policies and guidelines
Assuming you’ve thoroughly tested your app on various Android devices and optimised its performance and responsiveness, it's time to ensure your app features align with Google Developer Policies.
These policies explain how your app needs to be developed and updated to comply with Google Play Store's quality standards. Areas of focus include design, functionality, content, monetization, promotion, privacy and legal requirements.
Step 4 - Create your app on the Google Console
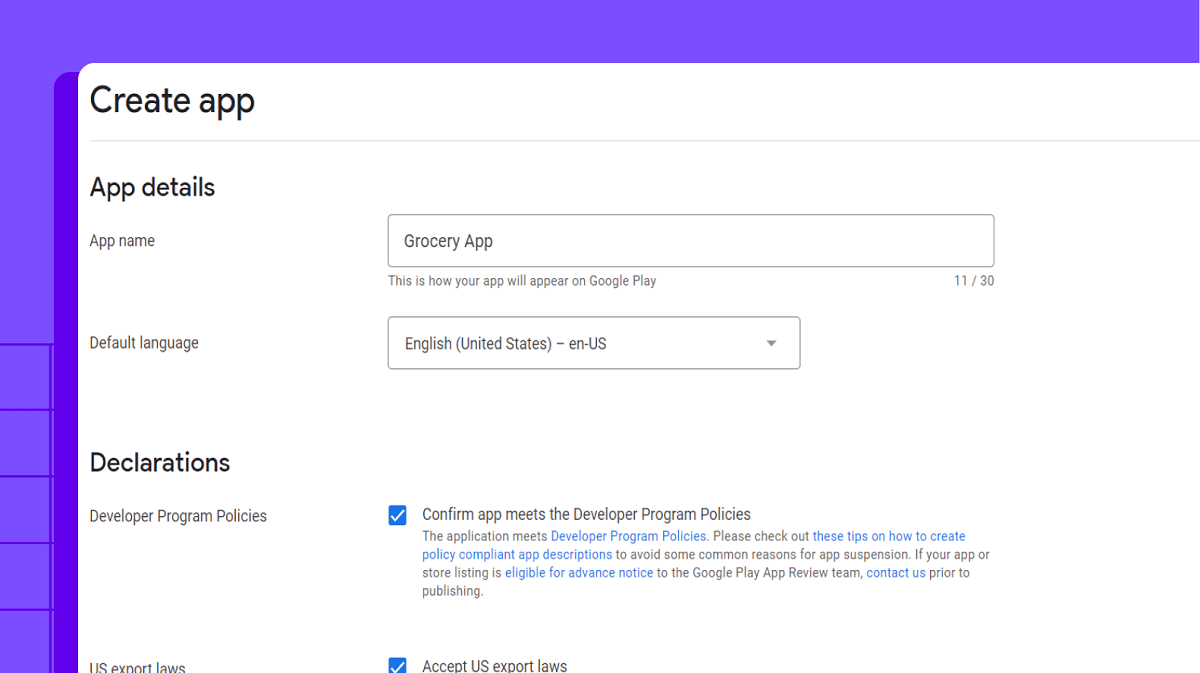
Once you’ve set up your merchant account, you can finally create your app in the Developer Account.
Here's how it's done:
- Select “All Applications” from the Menu
- Click on “Create Application”
- Choose the default language setting from the drop-down menu
- Enter the title of your application in under 30 characters
- Click on “Create”
The title of your app is shown on Google Play after it's been published. You can always change the title of your app later, so there is not much to worry about here.
After the app is created, you'll head to the store entry page to fill out the store listing details.
Step 5 - Prepare store listing
In this step, you need to prepare your app's store listing.
You can either fill it in one go or revisit it later to complete it by saving the draft, but one thing’s for sure:
You need to be mindful of . This is similar to search engine optimisation (SEO) and ensures that your customers can both discover your app and are encouraged to download it.
The information required for the store listing is as follows:
- Choose an appropriate and memorable tile (50 characters), short description (80 characters) and full description (4000 characters)
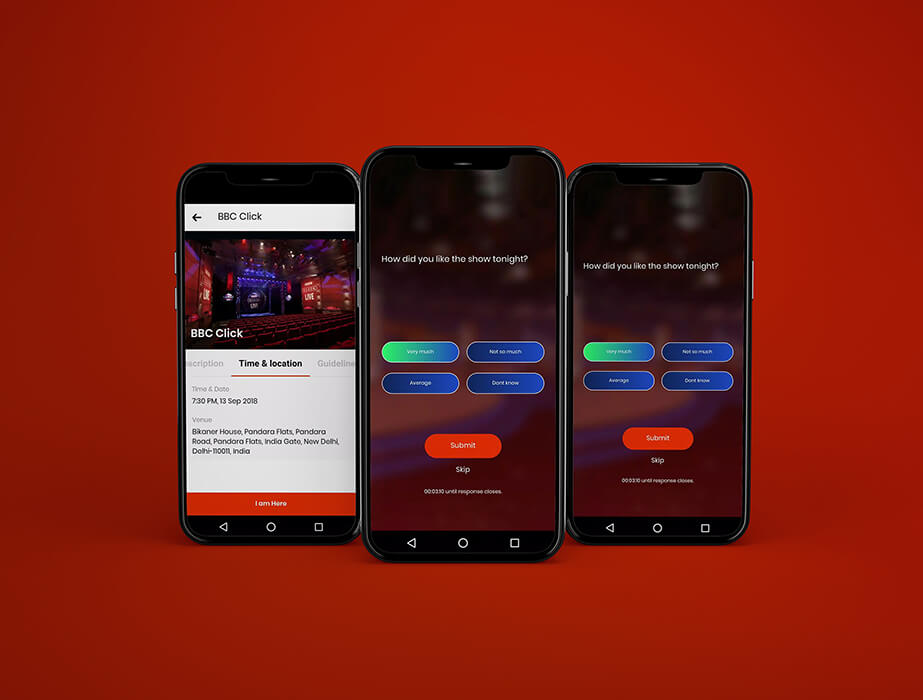
- Add your app screenshots, icons, images, videos and other graphical elements
- Add translations of your app's information into app store optimizationother languages
- From the drop-down menu, choose your app's category and type
- Add your contact information like, email, phone number and website
- Add the link to your privacy policy that discloses how your app collects, shares and uses the data
Step 6 - Upload Android Package Kit (APK)
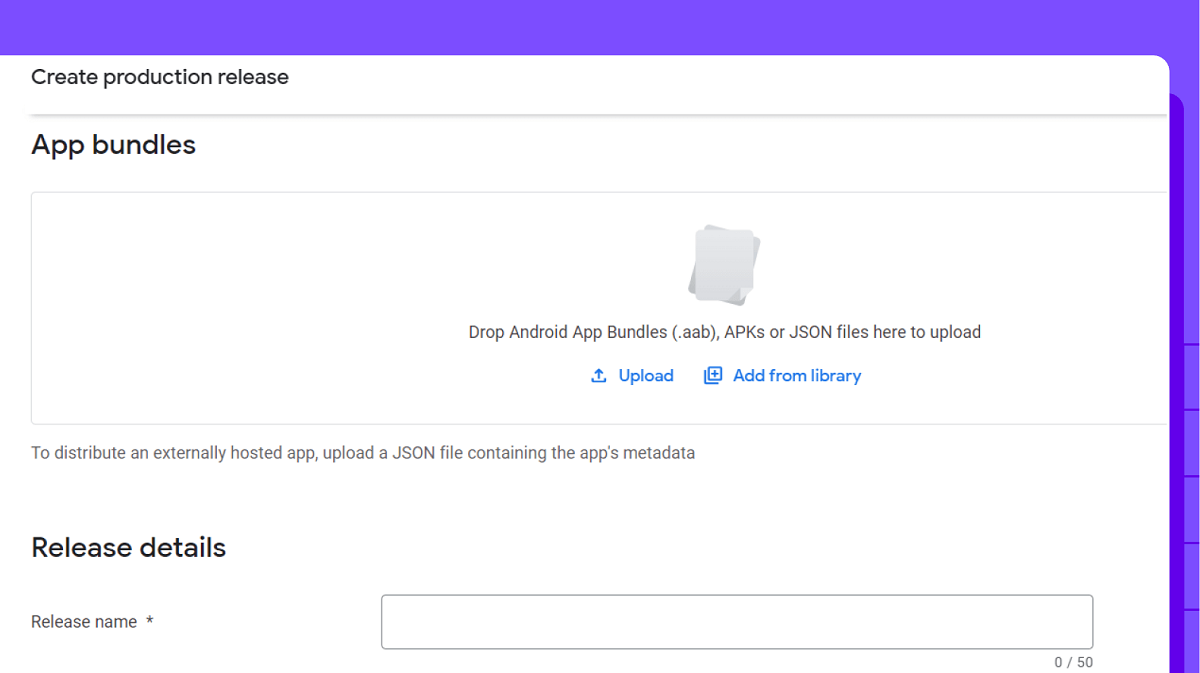
Now it's time to upload your APK file. APK is the file format Android uses for storing, distributing and installing apps on Android mobile devices.
Your APK can be uploaded by dragging and dropping the file into the box or browsing the file from your computer.
Here's how it goes:
- Click on “Release Management” from the menu on the left side
- Click “App Releases”
- Select the type of release. You can choose between an internal, closed, open, or production test
Top tip
If you’re simply planning to test your app right now, then stick to internal, closed and open tests. But if your app is thoroughly tested and you wish to introduce it to the masses, select the production test.
Step 7 - Add content rating
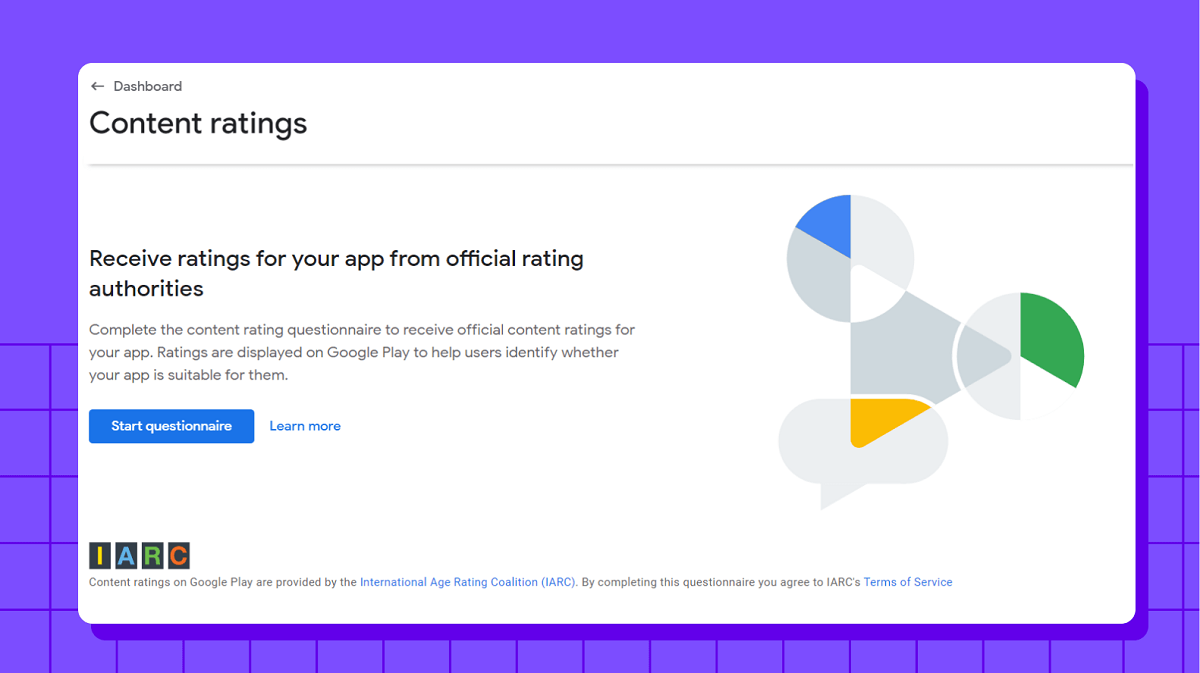
As an app developer, you need to self assess your app and select an age rating appropriate to your target audience.
To make sure you have all bases covered, click on “Store Presence” from the left menu. Here, you need to fill out the content rating questionnaire. Check that you enter the correct information, or it can lead to suspension or removal of your application from the Google Play Store.
Step 8 - Review app pricing and availability
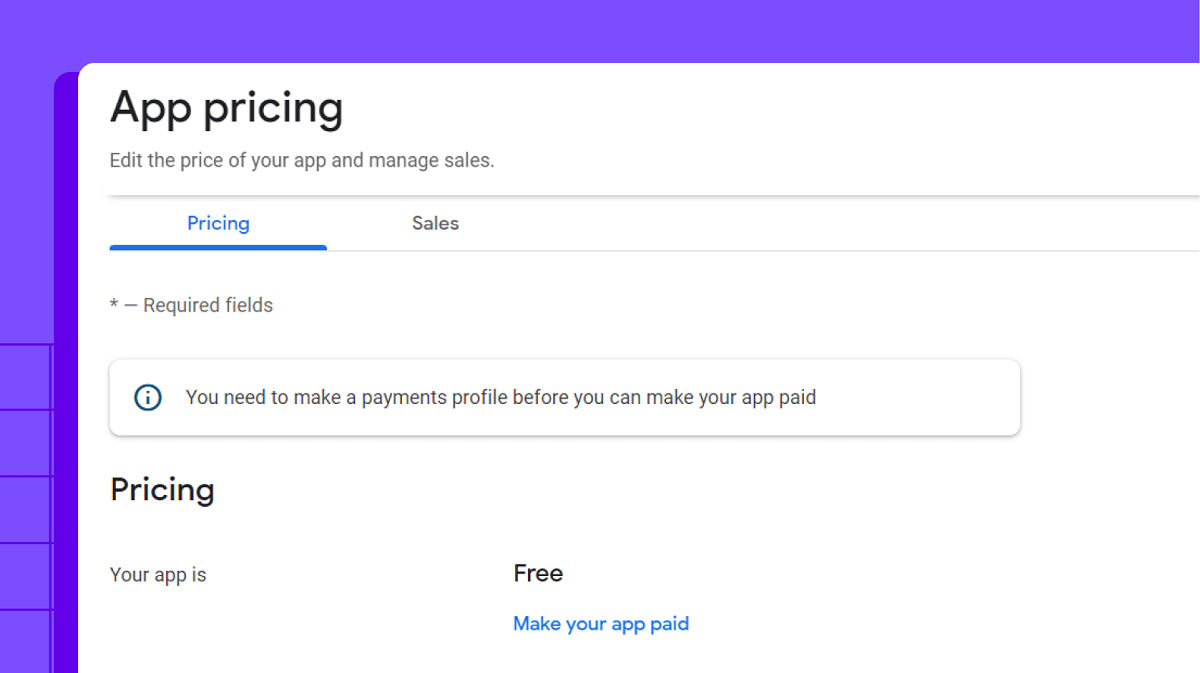
As we move closer to publishing your app, it's time to make some decisions about your app's pricing and distribution model.
It's worth noting that you can make paid apps freely available at a later date, not the other way around. This is why you need to understand your pricing model beforeit goes live on the Google Play Store.
Here, you also need to choose the countries where your app will be available. If your app is specific to a particular geography, then you can mark specific countries; otherwise, select all countries for your app distribution.
Step 9 - Configure, test and publish
Now, things are getting exciting! But before you select ”Confirm Rollout,” you need to make sure that you've taken care of everything. This includes:
- Double checking the store listing, pricing and availability, and content rating sections are check-marked green
- Ensuring all in-app purchases are functioning properly
- Testing purchase flows, subscriptions and restore options
- Verifying that users receive the expected content and features after they make a purchase
- Ensuring your app complies with legal requirements like privacy policy and data collection
- Verifying your app doesn't include any prohibited content or violate intellectual property rights
When you have all that worked out, click “Review” and see if any issues or warnings might have passed under the radar. If not, then finally, you can select “Confirm Rollout”. Pressing it sends your app for review and after 4-5 days, your app will be published to all target countries on Google Play.
What should you do after submitting your app?
After you’ve submitted your app to Google Play Store, the real work begins. You need a comprehensive strategy to maximise downloads and keep your users engaged. You also need to maintain your app and gather ratings and reviews. Let’s dive into the key steps you need to follow after you’ve submitted your app 👇
1 - Build out your marketing function
After launch, marketing your app should be your top priority. Here are some of the steps you need to take to increase visibility, generate leads and, ultimately, drive sales.
- Assess your marketing activity - understand which strategies, channels and campaigns already perform well for your business and outline where you need to plug gaps
- Set up a Google business listing - enhances your online visibility and makes it easier for customers to find and connect with your business
- Set up reporting- tools like Google Analytics help you measure marketing performance and better understand your target users’ behaviour
- Automate CRM integration- effectively track and score leads to optimise conversion rates
- Create an SEO strategy- use content marketing to build topical authority within your niche and rank on page one of the search engine results page (SERP)
- Work on ASO - add relevant keywords to the description of your app and choose appropriate tags and categories so that Play Store users can find your app
- Use influencer marketing- work with influencers from your niche to increase the reach of your app
- Run PPC and paid social media campaigns - find and convert customers with buying intent on search engines and on social media platforms using a range of textual and visual media
- Create a social media calendar- engage with potential customers on social media by scheduling regular text, image, video and audio posts
- Start email marketing - craft personalised email campaigns to inform your target audience about your new app's features and exclusive benefits
- Establish a relationship with media- use press releases to help create buzz around your app and build awareness of it beyond your usual audience
With your app launch, you need to go all out, guns blazing. Your marketing function should be highly focused and well-developed because it not only helps you increase app downloads but is essential for the growth and success of your business.
2 - Increase app user engagement
Building a marketing function certainly helps you increase downloads. But once a user downloads your app, you need to make sure that they keep coming back. Here are some tried-and-tested ways to increase app user engagement increase app user engagement:
- Decrease onboarding friction - simplify the registration process and educate users about app features using step-by-step tutorials
- Leverage push notifications - send users personalised notifications about rewards, promotions or new features
- Use gamification - award points for activities like daily login, completing tasks or sharing content; users can redeem these points for exclusive app features or content
- Offer rewards - give users exclusive rewards for reviewing your app on Google Play Store
- Build an in-app community - encourage users to interact and share insights
- Listen to your customers - insert feedback forms at strategic points in your app to solve customer problems
Once your app is live on Google Play Store, the real work begins. But by staying proactive, you’ll build a loyal customer base and grow sustainably over the long term.
3 - Improve Play Store ratings and reviews
If your app has low ratings, it’s less likely to appear in the app store’s search results. This is because app store algorithms prioritise apps with higher ratings and better user reviews. Here are some of the steps you can take to improve your ratings and reviews:
- Take a user-focused approach - ensure that your users get value out of your app and have a seamless experience along the way
- Time your triggers - strategically time the request to write a review, catching users when they’re likely to drop positive reviews
- Incentivise users - offer users rewards, discounts or exclusive content in exchange for leaving a review
- Reply to all reviews - recognise users' concerns and provide genuine feedback
- Act on feedback - analyse the feedback given by your users carefully and make updates to your app
- Never buy fake reviews - avoid the temptation to buy fake reviews at all costs, as they damage your app’s credibility
- Report offensive reviews - this way, you’ll maintain the overall quality of feedback and, at the same time, prevent them from impacting your app’s ratings
Whether positive or negative, your app's reviews and ratings tell how good your app is and how satisfied your users are. They have a direct impact on the visibility and popularity of your app.
4 - Maintain and optimise your app
Launching your app isn’t your final destination. If you want to secure long-term success, your app needs to run smoothly long after your launch date, and add new value to users over time.
That’s why maintaining and optimising your app is essential. Here are the steps you need to follow:
- Fix bugs - release updates to fix bugs and improve performance
- Monitor performance - continuously monitor your app's performance, like loading speed, battery usage, smooth functioning across devices, etc
- Add new features - keep your app updated by adding new features, exclusive benefits and following new industry trends
- Analyse user feedback - seek and analyse user feedback and address their concerns to enhance usability
- Improve app security app security measures - prevent your app from potential security threats and user data leakage by taking active security measures
Investing in app maintenance will help you achieve all of these outcomes, allowing you to improve customer loyalty and expand your user base.
How to upload apps to Google Play Store (the easy way)
Launching an app to Google Play Store is a huge milestone for your business. But, like everything in the app development process, nothing is quite as straightforward as it seems.
That’s why, when you make an app with Builder.ai, you get step-by-step support, helping you to follow best practices when uploading your app.
This means you can stop fiddling around with cumbersome admin and start generating revenue from your app as soon as possible.
We also help you market and maintain your Android app to ensure long-term success. To learn more, check out Studio One 👈
Gaurav is the SEO Content Writer at Builder.ai. Being an Engineer and Marketing MBA, he has a knack for converting technical jargon into marketing content. He has 8+ years of experience creating content and designing marketing campaigns that drive organic growth for B2B companies and tech startups.


 Facebook
 X
X LinkedIn
 YouTube
 Instagram
 RSS
RSS